Use Arch Linux and Xmonad on MacBook Pro with Retina Display
Feb 27, 2013I just recieved the latest stunning MacBook Pro Retina 15” (ME665) released in Feb 2013, couldn’t wait to install the Arch Linux 2013.02.01 on it, dual boot with Mac OSX. All my up-to-date configurations on GitHub.
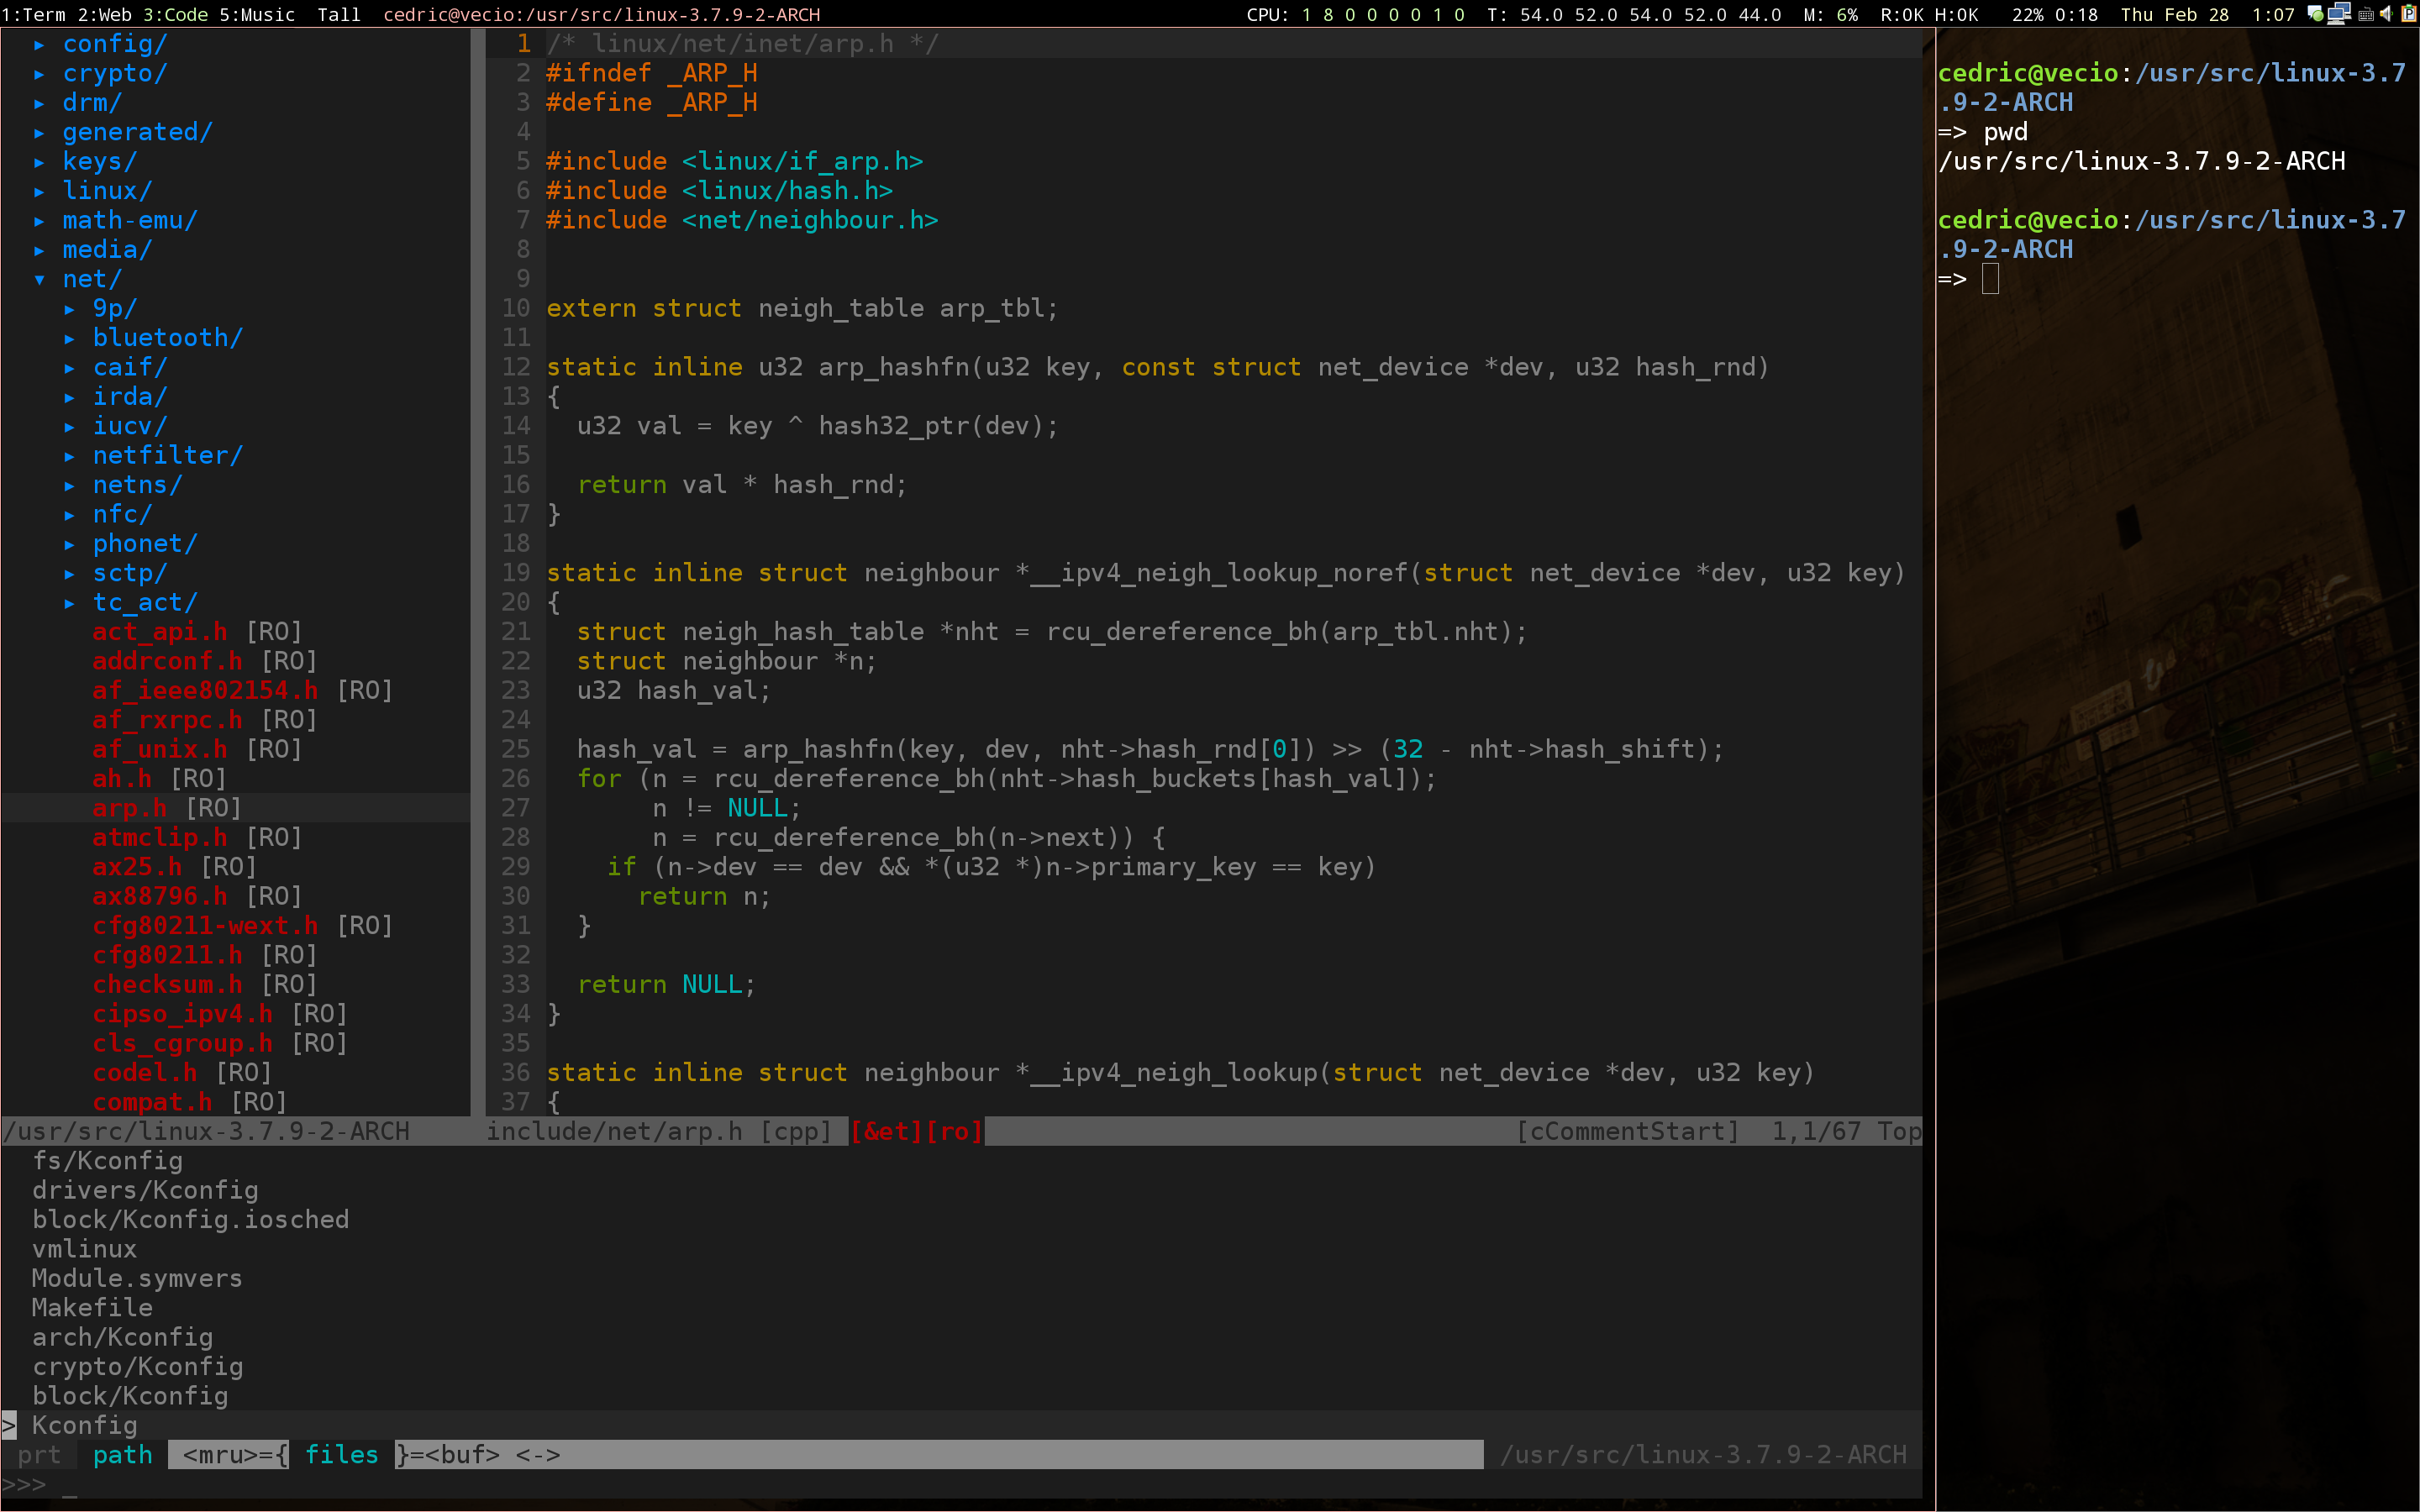
I’m impressed by the performance of this device after working with the combo of Arch Linux and Xmonad for several days, everything works out of the box, including touchpad, audio, video, wireless network, bluetooth, etc. Even the apperance of most apps are compatible with the high resolution of Retina display.
Another important thing is the battery life, 5 hours! Program and compile, listen music, download AOSP through Wi-Fi, watch YouTube videos with Flash hardware accelaration on.
Prepare
WARNING: PLEASE MAKE SURE YOU KNOW EXACTLY WHAT EACH COMMAND DOES, ESPECIALLY THE DISK RELATED, THIS MAY ERASE YOUR IMPORTANT DATA PERMANENTLY! NO WARRANTY!
Update the Mac OSX and reboot, then run the Disk Utitlity to resize the Macintosh HD to 100GB, all the remaining space are reserved for Linux.
Prepare an Arch Linux USB disk, I created one with dd bs=512k if=archlinux.iso of=/dev/sdb.
Partitions
Reboot from USB by keep pressing the option key, and you will be prompted the zsh console from Arch Linux installer.
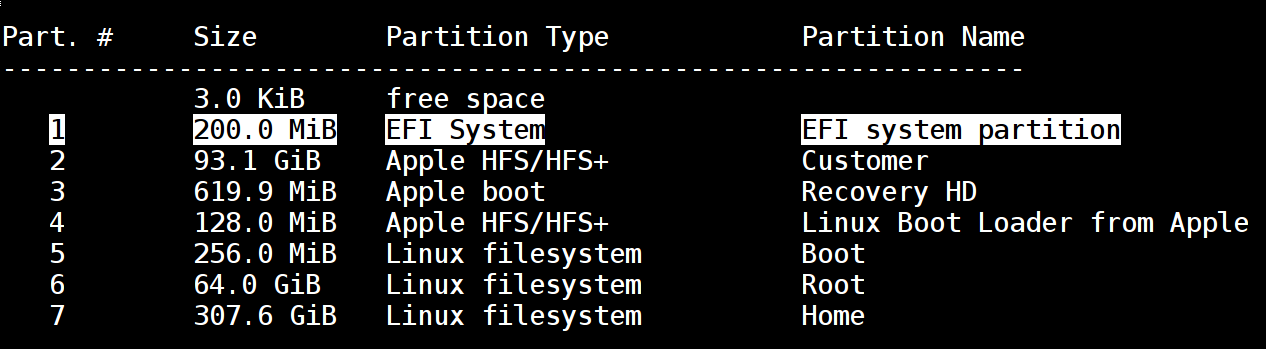
Run cgdisk /dev/sda to create partitions according to the following chart:
Network
The installation of Arch Linux needs an active network connection, I’ve three simple choices to connect Internet.
- The USB Tether feature from my Android devices and iPhone 5. It just works.
- A Thunderbolt to gigabit Ethernet adapter, connect it before booting. Thunderbolt hotplugging is not supported.
- Use wireless network, it needs a working network to install the
broadcom-wl-dkms. Then runwifi-menuto connect to WIFI. It works with great performance!
Install
At first, encrypt my home partition with dm-crypt:
cryptsetup -c aes-xts-plain64 -y -s 512 luksFormat /dev/sda7
cryptsetup luksOpen /dev/sda7 home
Then it’s time to format most partitions and install the system
mkfs.ext2 /dev/sda5
mkfs.ext4 /dev/sda6
mkfs.ext4 /dev/mapper/home
mount /dev/sda6 /mnt
mkdir /mnt/boot && mount /dev/sda5 /mnt/boot
mkdir /mnt/home && mount /dev/mapper/home /mnt/home
pacstrap /mnt base base-devel
genfstab -p /mnt >> /mnt/etc/fstab
echo 'home	/dev/sda7' >> /mnt/etc/crypttab
As the storage device is an SSD, so I tuned some parameters in /mnt/etc/fstab:
/dev/sda5        /boot  ext2  defaults,relatime,stripe=4	0 2
/dev/sda6        /      ext4  defaults,noatime,discard,data=writeback	0 1
/dev/mapper/home /home  ext4  defaults,noatime,discard,data=ordered	0 2
Configure
After everything are installed, I’d love to do some basic stuffs before reboot.
arch-chroot /mnt /bin/bash
echo applinux > /etc/hostname
ln -s /usr/share/zoneinfo/Asia/Hong_Kong /etc/localtime
hwclock --systohc --utc
useradd -m -g users -G wheel -s /bin/bash cedric && passwd cedric
pacman -S sudo
nano /etc/sudoers # to uncomment wheel line
Locale is set by edit /etc/locale.gen to uncomment the desired locales:
en_US.UTF-8 UTF-8
zh_CN.UTF-8 UTF-8
Then generate the locales and set the LANG environment variable:
locale-gen
echo LANG=en_US.UTF-8 > /etc/locale.conf
export LANG=en_US.UTF-8
Also modify /etc/mkinitcpio.conf to insert keyboard hook after autodetect.
mkinitcpio -p linux
Bootloader
I want to boot directly from MacBook’s EFI boot loader, so I just need to craft the boot.efi:
pacman -S grub
At this point, remember to alter /etc/default/grub with:
GRUB_CMDLINE_LINUX_DEFAULT="quiet rootflags=data=writeback"
Now generate the boot.efi and place it somewhere such as a USB device:
grub-mkconfig -o boot/grub/grub.cfg
grub-mkstandalone -o boot.efi -d usr/lib/grub/x86_64-efi -O x86_64-efi --compress=xz boot/grub/grub.cfg
Then exit chroot and umount all filesystems and reboot to Mac OSX again. Launch Disk Utility to format (e.g. erase) /dev/sda4 to HFS+, it’s the place where grub2’s image will live in.
According to this article, create directories and files in /dev/sda4 with the following structures:
|-- System
|   `-- Library
|       `-- CoreServices
|           |-- SystemVersion.plist
|           `-- boot.efi
`-- mach_kernel
The mach_kernel is a blank directory and boot.efi is generated by grub-mkstandalone. The contents of SystemVersion.plist:
<xml version="1.0" encoding="utf-8"?>
<plist version="1.0">
<dict>
	<key>ProductBuildVersion</key>
	<string></string>
	<key>ProductName</key>
	<string>Linux</string>
	<key>ProductVersion</key>
	<string>Arch Linux</string>
</dict>
</plist>
After all files created, we need to bless this partition to make it bootable by issuing
sudo bless --device disk0s4 --setBoot
Then reboot to Arch Linux.
Xorg
In this installation I choose to use the nvidia graphic card only, so below are the steps.
pacman -S xorg-server xorg-xinit xorg-server-utils xf86-input-synaptics nvidia acpid
systemctl enable acpid
nvidia-xconfig
echo "install i915 /bin/false
install intel_agp /bin/false
install intel_gtt /bin/false" > /etc/modprobe.d/video.conf
Then add two options to the Device section in xorg.conf:
Option         "ProbeAllGpus" "false"
Option         "UseDPLib" "off"
The screen backlight can be adjusted by change /sys/class/backlight/gmux_backlight/brightness, valid only after sudo setpci -v -H1 -s 00:01.00 BRIDGE_CONTROL=0.
The keyboard backlight can be tuned with /sys/devices/platform/applesmc.768/leds/smc::kbd_backlight/brightnes.
Xmonad
I prefer Xmonad because I want to learn Haskell, really. The slim, terminator and some little utilities will also be installed in this step.
yaourt -S xmonad xmonad-contrib cabal-install slim terminator \
         xmobar dmenu-xft trayer scrot xscreensaver feh parcellite \
         pidgin networkmanager-applet xfce4-notifyd gnome-keyring \
         git nautilus ranger
cabal update && cabal install yeganesh
systemctl enable NetworkManager
systemctl enable slim
systemctl disable bluetooth # Because I never use it
Then I cloned vicfryzel’s xmonad config from https://github.com/vicfryzel/xmonad-config, and made several small tweaks.
Add the following lines to ~/.xinitrc to manage all the keys of the session, e.g. SSH key passphrase, Wi-Fi password.
# Start a D-Bus session
source /etc/X11/xinit/xinitrc.d/30-dbus
# Start GNOME Keyring
eval $(/usr/bin/gnome-keyring-daemon --start --components=gpg,pkcs11,secrets,ssh)
# You probably need to do this too:
export SSH_AUTH_SOCK
export GPG_AGENT_INFO
export GNOME_KEYRING_CONTROL
export GNOME_KEYRING_PID
Also remember to remove the deperacted ck-launch-session from ~/.xinitrc, change to exec dbus-launch --sh-syntax --exit-with-session xmonad, this will fix the Trash and Network related problems in nautilus:
Sorry, could not display all the contents of “trash:///”: Operation not supported
Keyboard
Create file /etc/modprobe.d/hid_apple.conf to change the F1~F12 behavior:
options hid_apple fnmode=2
Add these lines to ~/.Xmodmap to swap the command and control key:
remove mod4 = Super_L Super_R
remove control = Control_L

add mod4 = Control_L
add control = Super_L Super_R
Install fcitx-im and start it in ~/.xinitrc:
export GTK_IM_MODULE=fcitx
export QT_IM_MODULE=fcitx
export XMODIFIERS="@im=fcitx"
fcitx &
The new look of fcitx is so amazing!
Apperance
I have to admit it’s hard to find the theme and icons to work properly on a Retina screen. At last, I found Numix as the GTK theme, KDE’s oxygen as icons, and Vanilla DMZ as the cursor theme.
To change GTK’s theme, you can edit ~/.gtkrc-2.0 and ~/.config/gtk-3.0/settings.ini, or simply use lxapperance.
In Firefox’s about:config, set layout.css.devPixelsPerPx to 2, then everything in the web will be retina ready, also recommend to install the FXChrome theme for Firefox.
Finally, the wallpaper is achieved by feh --bg-fill -z ~/Pictures/Wallpapers.